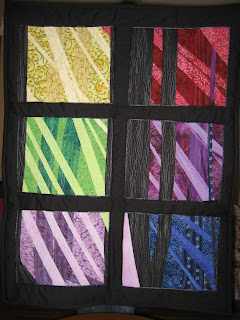
The background is finished on the Lily Quilt, as is the fusing of the stabilizer and machine applique. Now all that stands between me and quilting bliss is the embroidery of those details that will make these lilies look like, well, lilies.
Before I went at the quilt with thread and a dream, I decided to do a test run to make sure I know that I'm achieving the results I want with my embroidery technique, and also that the stabilizer I'm using will be stable enough to keep the fabric from puckering. Out came the ugly fabric I know will never be used for any other purpose. Out came the scrap batting and stabilizer.
So it began. I did find a certain amount of fabric puckering did occur under the weight of all those stitches. What to do? I couldn't put too much more stabilizer under there, or I would find it hard to quilt later on. Maybe, just maybe, it would sort itself out when I quilted around it. I gave it a try.
Presto! It DID work itself out in the quilting. I did find that there were directions that the stitches could go in to ease the puckers out. But I feel I can go into the embroidery of the real deal without too much fear.
Here I go!
Wednesday, August 12, 2009
Monday, August 10, 2009
Lilies, Revised
Last week, I put together the background and lilies for the big Lily Quilt. But, I wasn't happy with how the background was working with the lilies. So, off to the quilt shop (Darn!) I went to find some fabrics better suited for the background of the quilt. This past weekend I futzed around with the gorgeous batiks I found and the background to get a more pleasing look. I think I finally struck the balance I was looking for.
Originally, I was trying too hard to match the colors that I found in the background of the original photo. To fix the design of the quilt, I had to put away the photo and focus only on design, not making the quilt look like the photo. What? Me? Growing? Nah.
I also added an internal border to the quilt, which immediately added depth. By having the petals of the lilies overlap this border, it looks like they're popping right out of the quilt. Presto!
I've ironed on a stabilizer and done the machine stitching around the edges of the applique pieces. There are still miles to go before I sandwich this puppy together with some batting and call it a quilt. I need to do the embroidery around the edges of the petals, as well as where they intersect in the center to create some stamens and pollen.
But it's starting to take shape...
Labels:
applique,
applique pieces,
batiks,
design,
embroidery,
fabric,
lilies,
machine applique,
quilt design
Wednesday, July 29, 2009
Lilies Tryout
Every art quilter I've talked to heavily emphasizes how instrumental a design wall is to their process. The idea is that you need to be able to see your design up on a wall, take a step back, and look at it from a distance to truly view it as a whole, as a piece.
Once again, my limited space handicaps my design capabilities. There is neither wall space nor floor space to install a design wall. Here is my evolutionary adaptation to this difficulty: As part of the design process, I will photograph progress and put it up on my computer. That way, I can let it sink in over time, and the problem areas should begin to stick out at me.
Here's my first picture of progress on the Lilies quilt. Keep in mind that I will add details to the lilies, including some embroidery to show the pollen tube and stamen, as well as to distinguish the petals from one another.
The real question is, what do you think of the background? Anything jumping out at you? Do these pieces work together, or do any of them need to be changed?
Wednesday, July 15, 2009
Lillies!
Last post, I wrote of a line drawing I had created to use as a pattern. I've posted the drawing here. So far, I have created the flower applique, and am in the process of figuring out the background.
The original photo I'm using for inspiration has some dirt and some leaves, so I'm thinking I'll use some browns and greens to piece together the background. In my mind they'll be curvy pieces, which means I'll be learning a new technique: piecing curvy lines! More on this later!
Labels:
applique,
art quilt,
background,
challenge fabric,
fabric,
lilies,
machine applique,
piecing,
quilting
Tuesday, July 14, 2009
Quilter's ADHD
I will try to keep my self-chastising to a minimum.
It has been too long since I have written here. Bad Megan!
There.
I’ve been suffering from a case of Quilter’s ADHD. I have grand designs and plans for half a dozen or more quilts. But, when it comes to carrying these out to completion, I find my mind wandering in its enthusiasm. All those little details that would enable me to carry out my design hound me with the possibilities. Self-doubt plagues me, and I hesitate.
For example. I picked up a quilt I began last year with the intent of entering it in the Quilters Treasure challenge. Last year, I changed course and submitted the Illuminated Grove quilt instead. This year, I picked it up with the intent of finishing it, now that I have some embroidery knowledge in hand. Still, I’m stuck on how best to represent the irises. I have some instruction on how to create them in the background and middle ground. But, there are some honkin irises that I want to put in the foreground and have yet to figure out the best way to do so.
In the meantime, I’ve been contemplating this year’s competition with Quilters Treasure, especially since I have the fabric for the challenge. I found a picture that inspired me greatly last week, and have since created a line drawing to make into a pattern. Last Friday, I found a blueprint shop nearby that was able to enlarge this drawing into a 30”X36” pattern. I feel like a whole new world has opened up for me, beyond the capabilities of the local Office Max.
Flying high off the ease with which I created this pattern, I cast aside last year’s quilt in favor of starting on this new quilt. Now, however, I have reached a snag with this quilt, and my mind is beginning to wander again.
Last week I found myself ordering a pattern for a whole other quilt online. Because I need to add more work to the queue! This isn’t just another project, either. Completing the project will involve learning a new quilting process all together.
I need a quilter’s intervention.
I need to focus on one project, weather the ups and downs, and finish it before moving on to the next. Otherwise, I will continue accumulating unfinished projects, which is something I have managed to avoid until now. So, for now, my goal is to finish the quilt for this year’s challenge competition. Then I can circle back and work on the one I began last year.
Labels:
art quilt,
irises,
lilies,
quilt challenge,
quilt contest,
quilters treasure,
quilting
Monday, June 8, 2009
Future Quilts?
I've been carrying my digital camera with me on my walks to the train station in the morning, and just about everywhere else. When you keep your eyes open, inspiration is everywhere. Like these locus trees on my morning walk. They're beautiful in their wildness. They don't follow the rules. Their branches grow here, there, wherever they please.
I love the moss and tiny branches sprouting out of the larger tree. This green is wild, beautiful green next to the luscious brown of the trunk. I can see this making a beautiful quilt.
Sunday, June 7, 2009
Purple Coneflower
I'm still catching up on unfinished quilts. This is one I picked up last weekend and finished during the week. The top was created during the International Quilt Festival in a class by Wendy Butler Burns on machine applique. I had already finished the top and fused it to Decor Bond, which is a stabilizer. The stabilizer is needed to keep the fabric from puckering up when you machine stitch over the seams. Last weekend, I did this machine stitching and discovered it's not as easy as I thought it would be to keep a steady line with a free-motion zig zag stitch. But, I soldiered on.
In retrospect, I think this quilt would have benefited from a border or two. However, I had a few roadblocks on that front. I didn't feel I had just the right fabric, for one. Mainly, though, adding a border would mean patching in more Decor Bond, and this was a process I had not done before. To put the binding on without a border, I didn't need to add any more of the stabilizer; so I took the easy way out. In the end, it's still pretty, and that's all I need.
There's something nice about knowing that the piece you're working on is not for anyone in particular, is not for a competition, and therefore will not be judged. This quilt was something that I could learn on, and something that I wanted to finish to please myself. I took this opportunity to experiment with some variegated silk threads I bought at the festival. They were even more luscious and beautiful than I thought they would be! Many of the threads turned out to be thicker than I anticipated, but the thicker thread creates a beauty of its own. I'm very happy with the way this quilt turned out!
Saturday, June 6, 2009
Embroidered Landscape!
Now that I have the baby quilts behind me for now (Stop procreating, people!), it's time to turn my attention to finishing some quilts that have been waiting patiently in line.
I turned to this task last weekend and realized that I have no fewer than half a dozen quilts in some stage of construction. They all need some love, and I'm tending to them each in turn.
Last weekend I paid some attention to this piece that I started at the International Quilt festival in April of this year. It was pretty well done. I just needed to trim it square, put a backing on it, stitch around the edges, and frame it. Done, done, done, and done!
The trees, leaves, grass, and flowers were all created using either a zig zag or straight stitch. You lower the feed dogs on the machine, put the pedal to the metal, and GO! The process is so liberating; it feels like you can do no wrong. You're not coloring inside the lines, you're making the lines. It's beautiful and freeing. Now I'm looking at thread in a whole other light; not as an accent to the picture, but as a means to create the picture. I think a new addiction has been born!
Thursday, May 28, 2009
Moving On
Here I am again--on the flip side of a project, with no deadlines in sight.
Almost.
In the mail this weekend, I received my prize booty from the Quilters Treasure challenge. It was some cotton batting and a yard of the challenge fabric for this year. The theme for the contest is "What Memories are Made Of."
Now I'm wracking my brain to think of what kind of quilt I could make out of these ingredients. Dangit! Their marketing schemes have worked on me!
I smell trouble...
Wednesday, May 27, 2009
Lucy Jane's Quilt, Finished and Delivered
Another quilt down!
There's something about each quilt that touches me, and makes me feel like it's a little bit the best I've done so far.
Of course, with Lucy Jane's quilt, the first thing that I fell in love with was the monkeys.
But, there's more than just monkeys at play here. I used a thicker quilting thread than I ever had: size 20 cotton. It was trickier to work with, of course. It wanted to fray in my machine and around the needle, and it didn't work nicely with the bobbin thread I was using, which was considerably thinner. I really learned how to use my tension dial to my advantage, and worked the thread.
I gave the quilt away on Saturday, and got the chance to visit it in its new home on Sunday. Lucy's parents had washed the quilt, making it soft and supple. It was the first time that I really saw a quilt in context, and felt it as a blanket. It was beautiful. The monkeys are home.
Labels:
baby quilt,
bobbin,
cotton thread,
quilts,
size 20 thread,
thread
Sunday, May 10, 2009
Monkey Business!
Normally, the backing of a quilt isn't that special. In the case of a quilt that is forever etched in my memory, the quilt backing turned out to be important only in that it foiled my quilting attempts. And, in the case of my niece's purple quilt, it was a beautiful piece of fabric that I wish I could use again and again.
Come to think of it, the quilt back can be special. Now, in the case of Charles's cousin's baby quilt (for Lucy Jane), I've fallen in love with the whimsy of the fabric. It's monkeys! Girl Monkeys! Aren't they adorable, floating around there with flowers in their hair, and against a purple background to boot! This is girlie in only the best sense of the word. I'm excited to give this quilt.
I'm also very pleased with how the yellow border works with the purple monkey fabric. The two fabrics complement each other so well, I'm a little frightened that I actually planned it this way.
Here are the monkeys, only closer up.
Labels:
baby quilt,
fabric,
girl quilt,
monkey fabric,
monkeys,
piecing,
purple fabric,
quilt
Wednesday, April 29, 2009
Quilting Studios, Quilting Corners
A Case of Studio Envy
In my email inbox this morning, I found something from Quilting Arts, pushing their Summer Studios issue. Has it been a year already since I was last taunted with everyone else's abundance of space, reminded of my own inadequacy?
It's not that I begrudge everyone their space. Okay, it is exactly that. I can't help feeling flush with the green of envy when I see pictures of studios, with shelves and shelves of fabric stretching from floor to ceiling. Or the tables devoted to nothing but the sewing machine, or separate tables for nothing but cutting or ironing. It gives me pangs when I see a design wall. That's an entire wall, devoted to nothing but a large piece of felt or batting. I've never known such riches.
My husband and I live in a two-bedroom condo in the city. I don't have a studio, or even a room devoted to my quilting. I have a corner. The corner of our living room is where my quilt love is allowed to flourish. A whole corner. And I have a table that folds up or out from Ikea that serves as my sewing/cutting table and design wall. And also a dining table.
A weekend or two ago, I had the time and inclination to do something about my fabric storage issues. So I set out to reorganize my quilting corner. I reasoned that, if I only had the proper tools of organization, if I just shuffled my materials around a little more, I would have plenty of room for what I have, and room to grow on.
In the end, I made a better space for myself. I took down a shelf that previously held our DVDs and repurposed it for thread and fabric. I pulled an old set of shelves out of retirement for my quilting books, batting, scraps, and miscellaneous project bins. And, I reorganized the drawers inside my cabinet. So, I have a system of organizing fabric that makes sense by size. All in all, I think it looks better and more organized. Is it like the gorgeous studios that line the pages of Quilting Arts? No. But in the end, it's not too shabby.
Sunday, April 26, 2009
Lucy Jane's Quilt
...and so it begins.
I've played with Electronic Quilt, and come up with the final design of the quilt for Charles's cousin's new baby. Here it is, according to the software. I scanned in the fabrics to my computer (love this feature!), so it's a fairly good representation of what the finished product will look like.
So, tonight I will begin the long and tedious task of ironing these fabrics so that the real fun can begin!
Wednesday, April 22, 2009
Virtual Quilt Festival
The task is: find your favorite quilt and post it on the Virtual Quilt Festival, on Park City Girl's blog. Click on this blog title to go see what all the fun is about.
The Wendy Quilt made it to the top of my list, simply because it's pretty, and it launched my quilting skills in so many directions. For the full story of the quilt, click here. Looking back a couple years later, I think this quilt gave me some confidence in my free-motion quilting ability that opened many, many doors. Now that's the part of the quilting process I look forward to most, regardless of the quilt. Working on the quilt also let me flex other creative muscles, and had me addicted to sun-printing. All of this discounts what could be the quilt's most significant attribute: it's purple.
Enjoy, and check out other groovy quilt blogs at the Virtual Quilt Festival.
Sunday, April 19, 2009
Quilting Festival
The International Quilt Festival in Chicago is over, and I'm recuperating. So is my wallet.
I was able to take quite a few classes this time around, and took away quite a bit. The first class was a day-long class from Wendy Butler Berns on a machine applique technique. To get our feet wet, we worked with one of her patterns: Captivating Coneflower.
The fabrics were our own that we brought in and arranged to finish out the design of the piece. I was surprised at how easy this technique really was. I have been living and working in fear of the dreaded applique, but in the end, this isn't that much harder than fusible applique. One of the things that I really liked about it was that there was no flipping of the design; we worked the entire time from the front of the fabric and the design. Edges were turned under, toward the back. This made it pretty easy to see how all the pieces fit together.
I was happy that I finished enough of the design to be able to transport it safely. All that is left to do on the quilt top is to add a dragonfly in the sky above the flower. This will be done with fusible, simply because the details are a little bit finer, making the process of turning seams under bulky and difficult. Then I can run a zig-zag stitch around the edges of each piece, and then it's ready to go.
One of the other classes I took was exceedingly fun. Bonnie Langenfeld taught a class on Saturday on creating a landscape with thread painting. It felt like there was no doing wrong with the stitching; it was so relaxed. It was very freeing, and already I'm addicted to the process and buying more luscious threads. A fiend has been created!
I actually finished the piece in class, too! This was a first for me, and many of my classmates.
Monday, April 6, 2009
Free-Motion Quilting...Loops?
While I was working on the last quilt, I ran into problems with these loops showing up on the back side of the quilt. It seemed if I kept my stitches neat and smallish, the effect would be minimized, but I grew frustrated with their presence, and my inability to eliminate them. What to do?
Last Thursday night, I was flipping through a book by Katie Pasquini Masopust and found a side-bar note about the subject. She suggests threading the needle with the presser foot in the up position, otherwise you'll find these loops on the underside of your quilt. In all the possible things I could think of that I might be doing wrong, this did not occur to me. And to think, I found this solution very much on accident.
So, I have hope that the problem will be resolved with the next quilt.
Friday, April 3, 2009
Baby Quilt Finished, Hurray!
Here it is, in all its glory: the baby quilt that was completed and given away last weekend. I really love how this turned out. The fabrics are all delicious and work perfectly together. And it looks exactly as Electronic Quilt said it would. Thanks to everyone who weighed in on which design I should use.
I was a little sad to see this quilt go!
I used strip-piecing to piece the top of the quilt. This means I sewed two long strips of fabric together, then cut perpendicular to the seam, creating smaller strips of two squares that were sewn together. Two sets of these strips were sewn together to create a 4-patch.
I've included some close-up pictures of the quilt so you can see the free-motion quilting lines. You can also see the fun navy fabric with the wacky flowers and random eyeballs. (Or olives? You decide.)
And here's the payoff at the end: the patch that says "I made this!" Also, check out the flowers on the back side of the quilt!
Sunday, March 15, 2009
Contest Winner!
My quilt, Illuminated Grove, won a prize in the Quilters Treasure Fabric Challenge. As a result, the quilt will be touring with the company and the other prize winners of the competition. It will be on display for all to see. Eventually, I think it will be on the Quilters Treasure Web site.
I am definitely jazzed about all this. I cannot believe I won something with my first contest entry! A lot of times, it seems so easy to doubt yourself, to wonder if you really are good at what you do. When something like this happens, it validates the hard work and taking myself seriously. I will be flying off of this for a while yet.
Thursday, February 19, 2009
Electric Quilt, Decisions
Playing With Design
Thanks to the wonders of EQ software, I have scanned the fabrics for the baby quilt into the computer and uploaded them to the design software.
Bammo! I'm on my way. Now, if I could only choose between the thirty-five permutations of the same design. I think I have it narrowed down to one of two designs:
Help!!! I gravitate toward one, because of my own prejudices toward color. But that doesn't mean it's baby-appropriate. Keep in mind, though, that I'm making a larger quilt so it can stay with the kid longer than just being a baby. I'm so torn!
Tell me what you think!
Wednesday, February 18, 2009
Focus
Here it is: My Achilles Heel.
My eyes are too big for my stomach. Literally and figuratively. For now, let's focus on the figurative.
Outside of my day job, I am a writer. I am a quilter. And I am beginning to see myself as an artist. Right now, all of these are dreams competing for my attention. Since I do have the aforementioned day job, which in a good week takes up 40-50 hours of my time, it doesn't seem like I have enough hours in the day for all my dreams.
So one of them has to take a backseat.
Unfortunately, I think that has to be the quilting.
The dream on the writing front is to revise my novel, get it published, and somehow magically become a full-time writer. My reasoning goes that this is a shorter, more certain road, than making a living off my quilting. But, when the day does come that I set my own schedule, am my own boss, I should have more flexibility for working my quilting into my life in a big way.
Don't get me wrong. I'm not going to stop cold turkey. I'm not even planning to stop, period. I just think that I need to downgrade the quilting to hobby for now, with fewer competition goals, less time set aside for quilting. Rather than spend time on the quilting every day, I am going to start spending time on the writing every day, setting the quilting aside for weekend fun.
In the meantime, I'm setting the artichoke quilt aside for now. Almost. I'm going to try to get to a good stopping place this weekend, then set it aside. I will then turn my attention to the baby quilt, due to a shower at the end of March.
Saturday, January 31, 2009
Ladies and Gentlemen...an Artichoke?
During the design class I took at the Quilting Expo in November, I had occasion to observe another person's source of inspiration, or one of them. The teacher had a file of pictures she had clipped from magazines that she thought might make a good design, either for the subject of a quilt or the design of quilting lines. Since then, I have started my own picture file, for those occasions when I find myself in need of some inspiration.
A new quilting challenge had me going back to this file to find inspiration for a quilt of fruit, veggies, or flowers. I pulled a few pictures of flowers, one or two of some fruit, and this one of an artichoke. I started to play with the picture of the artichoke, tracing its lines and daydreaming about fabric. In so doing, I found myself entranced. At the beginning of this process, I doubted I would find a fruit or vegetable to inspire a quilt. Maybe, maybe, I could find some flowers that wouldn't be trite. But now, here I was, falling in love with the artichoke.
Over the last couple weeks, I've scanned it in, converted it to black and white, and made a template of it. All along the way, the artichoke kept getting prettier and prettier. Let's hope the same can be said of the quilt.
It's a Tough Job...
...but somebody's gotta do it!
Today I went through the agonizing process of going to a quilting store and choosing fabric for some upcoming projects. (Check the store out at www.quiltology.com.) This brutal process involves passing through rows of quilting fabric, looking for fabrics to catch my eye, auditioning them against one another to see if they fit. I have to pull the fabric off the shelf, touch it, look at the pretty colors...
It's agony, but I am willing to suffer for my art.
What projects looming on the horizon inspired such a visit? Well, there's the artichoke quilt that I'm doing for a competition (more on that later), and also the quilt for a dear friend's baby shower. She's due at the end of April with a baby girl, and the shower is at the end of March. So, not a ton of time to finish said quilt, but enough. Enough.
In the end, I decided on some fabrics for the baby quilt to complement the decor of the baby's room now, but have enough variety in the color scheme to accomodate any change in decor. Hopefully this quilt will be something the kid has for a long time.
These fabrics seems whimsical, but not childish. Exactly what I was looking for. I've scanned them in and started playing with them in my EQ software. So far, I'm loving just about every configuration of them. More play...more hard decisions.
'Tis the life of a quilt addict.
Thursday, January 29, 2009
New Projects Abound
Since finishing the Illuminated Grove quilt, I found myself a little out of sorts with the quilting projects. There were no particular projects looming on the horizon. Sure, I had vague notions of finishing another quilt I started in classes in November, or the original quilt I started for the competition. But, there was no real impetus.
Have I mentioned that I work better under a deadline?
So it was that I found myself, at the beginning of this month, dumping out all my scraps to do . . . SOMETHING . . . with. But what?
First, I found that these scraps would need sorting. Some of them were long and thin, and would be ideal for weaving. Some of them were large enough to be pieced into another quilt someday. Perhaps a crazy quilt? And some, oh some were tiny and gorgeous. They couldn't be salvaged as pieces of anything; there wasn't enough room for even a basic seam allowance. These scraps I decided would be great for some fabric collage.
The problem with this process was that, by the time I made it through the sorting, I was exhausted. My lofty ambitions of finding something to do with all of my scraps were dashed. But, over the course of the next week, I assembled some collage sandwiches. Here's the process:
1. Pull out some water-soluble stabilizer. Place a layer a little bigger than the collage you want to make on the table.
2. Place scrappy bits of fabric on top of stabilizer. These bits can include small pieces of fabric, yarn, thread, etc. I like to collect the tangled mess of unraveled fabric that gets cut off quilt fabric when it comes out of the dryer. I suppose you could throw in the dryer lint, too, if that made you happy. Personally, I don't like the look of it. Anyway, arrange these happy scraps in a way that pleases you. I like to add some Angelina fibers to the top for a shiny look, if it seems appropriate.
3. Unless it's the look you're going for, make sure that you don't see any table showing through the middle of your collage to avoid holes in the collage.
4. Cover with another layer of stabilizer and pin the heck out of the sandwich. (You can see some of the pictures of collage sandwiches I have yet to complete.)
5. Go to your sewing machine and free-motion stitch the heck out of the sandwich. You want to keep the stitching very close together and all over; these stitches are what's going to end up holding the collage together.
6. Once you've finished stitching, go to your sink and rinse out the stabilizer. Lay flat to dry.
These are some of the collages I did finish. In the meantime, projects have arisen. More on that later!
Have I mentioned that I work better under a deadline?
So it was that I found myself, at the beginning of this month, dumping out all my scraps to do . . . SOMETHING . . . with. But what?
First, I found that these scraps would need sorting. Some of them were long and thin, and would be ideal for weaving. Some of them were large enough to be pieced into another quilt someday. Perhaps a crazy quilt? And some, oh some were tiny and gorgeous. They couldn't be salvaged as pieces of anything; there wasn't enough room for even a basic seam allowance. These scraps I decided would be great for some fabric collage.
The problem with this process was that, by the time I made it through the sorting, I was exhausted. My lofty ambitions of finding something to do with all of my scraps were dashed. But, over the course of the next week, I assembled some collage sandwiches. Here's the process:
1. Pull out some water-soluble stabilizer. Place a layer a little bigger than the collage you want to make on the table.
2. Place scrappy bits of fabric on top of stabilizer. These bits can include small pieces of fabric, yarn, thread, etc. I like to collect the tangled mess of unraveled fabric that gets cut off quilt fabric when it comes out of the dryer. I suppose you could throw in the dryer lint, too, if that made you happy. Personally, I don't like the look of it. Anyway, arrange these happy scraps in a way that pleases you. I like to add some Angelina fibers to the top for a shiny look, if it seems appropriate.
3. Unless it's the look you're going for, make sure that you don't see any table showing through the middle of your collage to avoid holes in the collage.
4. Cover with another layer of stabilizer and pin the heck out of the sandwich. (You can see some of the pictures of collage sandwiches I have yet to complete.)
5. Go to your sewing machine and free-motion stitch the heck out of the sandwich. You want to keep the stitching very close together and all over; these stitches are what's going to end up holding the collage together.
6. Once you've finished stitching, go to your sink and rinse out the stabilizer. Lay flat to dry.
These are some of the collages I did finish. In the meantime, projects have arisen. More on that later!
Saturday, January 17, 2009
Kitchen Antics
Starring Charles and Roxy
In case you haven't met my puppy, that's her there, all curled up on her bed. She looks all cute and adorable and calm when she's asleep. This is not a story about her being cute and adorable and sedate. This is a story about how she's psychic.
She has the amazing ability to intuit when you are getting ready to take her out for a walk. Somehow, she knows the difference between when you are putting on pants and shoes to go somewhere, and when you are putting on pants and shoes to take her outside. When the occasion arises that you're taking her outside, she gets all worked up and prancey. This behavior can annoy Charles, as he's trying to move around the condo, putting on the aforementioned shoes or getting a poop bag or putting his coat on. To be fair, the general pranciness of the dog can get in the way of maneuvering around what I shall refer to as the cozy space of our condo. (Read: small.)
A few nights ago, Charles found himself facing a particularly prancey Roxy. She was prancing around in circles around him in the kitchen, as he was making his way to the back door of the condo. So, as is customary in our little family, he talked back to the dog.
"God, you're annoying, Dog! How would you like it if I did the same thing to you?"
And then, (I am not kidding), Charles began to prance in circles around Roxy. Roxy looked up at him with adoration. Well, Roxy always looks at Charles with adoration. But, mixed in with the adoration and love was a sense of bewilderment and happiness. She was thrilled to be getting attention back from him! She DID like it when he did the same thing to her that she did to him.
Perhaps Charles sensed that he wasn't really proving anything to our dog. Perhaps he got tired of running around in circles. Either way, or as I suspect, with a mixture of both, Charles pulled out of his prance-circle and leaned up against the refrigerator. His eyes got all wide and he threw his arms out to the side in a gesture that clearly signified that he was battling a serious case of dizziness. "Woah!" he said.
The man, in an effort to prove a point to the dog, made himself so dizzy he could barely stand.
There was some panting (both his and the dog's). And there was some serious laughter (mine).
The End
Friday, January 16, 2009
Catching Up: Christmas Tongue and Drawings Done
So, about catching up on my blog...
Here are some items I've been meaning to address.
Charles and the Green Tongue
Sorry ladies, this handsome commodity is taken. And I'm the lucky lady that gets to call him mine! This, my friends, is what you get when you put my husband in the same house with six or more dozen holly cookies.
For those few who may not know what these are, they're kind of like Rice Krispy Treats. Only they're made with Frosted Flakes instead of Rice Krispies. And they're dyed green. And they're dropped on a cookie sheet to create a small ball-like shape. And Red Hots are placed in the middle to look like the holly berries.
Regardless of how they're made, the end result of eating at least one entire batch in one night is a condition I like to call greenicus tongicus. Or verdilingus for our sophisticated friends. Sadly, it's an affliction that is brought on by oneself, and your only recourse is to wait it out.
Pretty Dead Tree
No, that's not a tree that's pretty dead. It IS dead. I just thought it was pretty, too. Maybe someday this will show up in one of my quilts.
This tree lives outside the house (not the one in the picture) where my brother and his family live. We stayed with them on our trip back home for Christmas. It was surprisingly calm, considering the 1-year-old and 3-year-old running around the house at Christmastime. It was a wonderful stay. Our puppy Roxy had so much fun romping around in their ginormous backyard. To be off a leash, and able to run so far at one time really does her good. Ah, how I'm sure she longs for the times when we had a backyard of our very own. Somehow, the courtyard of our condo building now doesn't quite compare.
Drawings Done
The last several weeks of my drawing class were focused on drawing the nude figure, which was a great learning experience. However, it wasn't so great for putting my drawings on the refrigerator or showing off on the Internets. However, there are two that I feel safe sharing. This first one was the result of a flaky model who didn't show for our class session. Instead, our teacher was the model, with clothes on! This was an interesting experience, all the same, because our teacher was pregnant at the time, so it was a change of pace in terms of the figure we were drawing. It brought a whole new dynamic to foreshortening.
Finally, this next drawing is definitely the most modest of the nude figure drawings I did, due to the pose the model chose. So, it's more appropriate for posting. I also love the lines in the figure. I have to say, I think that this is my favorite figure drawing so far. How appropriate that it was done on the last day of class!
Illuminated Grove, Finished
These are the finished pictures of the Illuminated Grove quilt. They're pretty similar to those I posted before, only now they have the benefit of the quilting lines. This is the big payoff, I think. It's one of the best parts of the whole process. It's as though the work that you put into piecing the top together all pays off at this stage. Lowering those feed dogs and watching the lines appear under your needle is what keeps me going through the end of a project.
I really had fun with the thread in this project. I bought a ton of it to use, which kind of defeated the purpose of using scraps up in this quilt. As did the other yards of fabric I bought to complement my scraps in this quilt. Ha! But, the threads will come in handy on other projects, I'm sure. And what fun it was to use them to pop with all the different and luscious colors of this quilt.
At the bottom of this post is a picture of the whole quilt. Those legs at the bottom are not the quilt's primary mode of transportation; they belong to my niece. She was doing the honors of holding the quilt up to be photographed.
Subscribe to:
Posts (Atom)